Wednesday, April 18, 2012

Make Your Own Enveloped Back Pillow - Tutorial


 Since the seasons are changing it is the perfect time to punch up your decor!  The "right" pillows can take a nothing room to fresh and fabulous within minutes.  Making your own throw pillows is super easy!  If you have access to a sewing machine and can sew a straight line then you are in business. 

 Step 1:

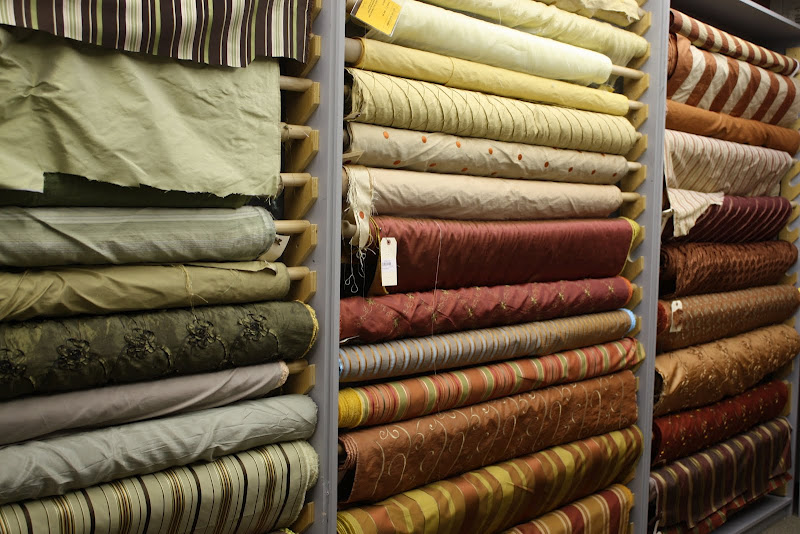
Pick fabrics that make you smile!


 Step 2:

This is the trickiest step (at least for me) because it involves math.  Measure your pillow that you are covering.  It can be a new pillow form or an existing one that your are recovering.  Measure from seam to seam and write it down.  Okay.  Now add 1" to the vertical measurement and 6" to the horizontal measurement for the back.  For the front piece add 1" to the vertical and horizontal measurement.  So if your pillow is 20" x 20" your back piece will be 21" x 26" and your front piece will be 21" x 21"

Got that?

Step 3:

Cut out your two pieces.  You can have both sides out of the same fabric or you can get creative and make them different.  There is no right or wrong way to mix fabrics!

Step 4:

Okay.  Now take your back piece and lay it in front of you.  Fold it in half horizontally and cut it straight down the middle.  Now you have two back pieces.

Step 5:

Take one side and fold over the edge 1/4" and iron and then fold it over again and iron.  You are making a hemmed edge and pin it with straight pins.  Stick your straight pins in horizontally so that they are easy to pull out as you sew.  Now repeat this step with the other back piece.


Step 6:

Machine sew a straight line along the edge of your hem.  Repeat this step on the other back piece.


 Step 7:

  Lay out your front piece of fabric face up on the table.  Make a mark on your fabric with chalk on the wrong side of your fabric if you have a damask fabric (like me) that is similar on both sides so that you know which side is the back.  Now lay the 2 back pieces on top of the front piece with the right side of the fabric facing down.  Over lap the back pieces.

Step 8:

Pin around the edge of the pillow and then sew around the entire edge.


 Step 9:

Once you have sewn around the entire edge pull out your pins. and snip off your corners.


Snip off the corners for sharper corners when you turn the pillow right side out.
 Step 10:

Turn your new pillow cover right side out and stuff the pillow form inside the cover.  And you are done!


Now wasn't that easy????


 Make another one!  Get creative...
 Make a statement!
I guarantee your pillow will be one-of-a-kind!

 So give your room some fresh new spring panache!
 
*You can even follow this same process with an iron and no-sew hem tape!

*The secret to success in creating a lovely pillow is using a high quality pillow form.  I am totally sold on pillow fills that are made from a mixture of feathers and down.  If you have a quality fill then you can get away with a lower quality of fabric.  I have found that if you make a pillow out of top of the line fabric it can look scrawny and shapeless if you use a lower quality fill.  So if you have to scrimp someplace do it with the fabric and not the fill.

Good luck!

Suzuki Violin (The Saga)

 Luke has been preparing for his "end of the year" violin concert.  Some of his violin playing has been adorable...and some not.  When he first got his violin he wanted to take it everywhere and show (and tell) everyone about all of the parts of the violin.  He is 4.  Not everyone wants to hear about all of the parts of the violin from a 4 year old although it IS amusing at times!  We have had our fair share of frustrating days but I do believe that he has learned something.  Luke has learned a lot of things in fact, considering he is 4 and he has only had a violin in his possession for 2 months!

He started his lessons in January.  You might think that I am crazy doing this with him with 4 week old Bevin tagging along?  I would agree, but I HAD to follow through with a commitment that I had started back in September.  You see, the whole premise of the Suzuki Method is that is that all people are capable of learning from their environment.  Which means that in order to learn the violin, it must be a part of our normal environment.  (Which it has not been.  Neither I or my husband have played the violin or currently play any musical instrument regularly for that matter)  So I learned how to play the violin first!  I was scared and when I found out that in order FOR ME to graduate I had to learn to play 6 variations of "Twinkle Twinkle Little Star" on a full sized violin.  Who?  Big 'ole pregnant me?  Yes.  And I did it!  In fact, I finished my class and played my "recital" a little over a week before giving birth.  I was large and I KNOW I looked ridiculous but I did it and now I can play the violin.  It was way easier than I imagined and I learned the same way that Luke is now learning.

 So 2 times a week Luke has violin lessons.  Early in the week he meets in a Beginner Theory class with two other little girls his age and after that he has group lesson.  I participate in the group lesson with him.  All the moms do.  We play games and learn about the violin in a group setting.  Then later in the week he has a private lesson for 15 minutes!  It is not long but he is 4 and his attention span is quite limited so 15 minutes is the perfect amount of time.  Actually sometimes it is too long and other times too short.  Maybe a week after getting his violin he had his first "Play-in" which is a concert in the sanctuary with all of the big kids.  A big part of the Suzuki Method is about performance presentation and performing in a group.  He has discovered that he really likes to perform on stage with the big kids!

 He still has a long way to go and much to learn but he already knows something...and isn't that better than nothing???
Luke in "rest position" with his teacher.
 Part of his learning process is practicing the "bowing" in the air.  It is a very peaceful and silent way to learn:)

Luke with his best "bow hold"
 Before Luke even had a violin he would tell me that he already knew how to play.  I suppose that is partially true.  He first learned to clap the rhythms, then he learned to bow the rhythms with a stick and sponge (practice violin), and now finally he has them down on the real violin.  

It has been fun watching all of these kids progress!  We used to observe the little boy behind Luke in his lesson back in September when I was learning to play.  Part of the learning process is observation.
 Luke has his first real concert this Sunday!  He is pretty excited to be on stage with the big kids and gets to play along with 4 songs and practice bowing in the air for 3 songs.  I am impressed because we actually went to watch this end of the year concert last year and he didn't even want to go into the sanctuary.  We sat in the very back row and I practically had to pin him down to sit still.  A year later he is up on stage performing!

Pretty good form I would say for 4?!

Easter Egg Hunting

 Our egg hunt this year was at the neighbors house!  We have neighbors that live across the street that are a family of 5 just like us!  Well, not JUST like us.  We have 2 boys and a girl and they have 2 girls and a boy.  Luke has been learning about all the joys that come along with having a neighbor friend!  It has been TOTALLY fun to watch as a mom.  I love to listen to their conversations and play!  It brings me a lot of joy to see them having fun together. 


The line-up


The moms hid the eggs and the dads took pictures!

Micah had a blast!

Luke was frantically trying to get the most eggs!

Our neighbors live right on the water.

Goose nest

The loot.

Bunnies must like candy?


Friday, March 23, 2012

Closet Makeover: Before and After


 In the month before I had Bevin I started getting restless about our disorganized closet.  The following photos do not even give justice to the disaster that it was.  We could not even walk into our "walk-in" closet.  I admit it was mostly my fault.  Piles would form and I would just push them to the back and make another pile.  Closets lend themselves to this type of behavior.  It was giving me a lot of unnecessary anxiety.  I wanted someone to make it all go away.  The anxiety was heightened by the fact that we were adding another person to our shrinking house.  With that person comes more stuff.  The walls were closing in...ahhhhhhhhhh!

After I had the baby and the NICU stress was over and then the holiday stress was over, my anxious feelings about my disorganized life came back!  You cannot run away from your problems they always find you!  I read an article in the Sunday newspaper that was written about closet organizing (probably because of the whole New Year's resolution thing) and closet organizing companies.  I remembered that I had picked up some information at the Parade of Homes Tour in the fall so I dug through my bag of information and found the brochure.  Closet Tamers will send a designer out to your house and give you a consultation for free.  I called the next day and set up an appointment for that week.

My biggest problem with my closet was that I felt in my heart that a lot of space was being wasted.  I was also frustrated by the fact that my hanging clothes were so tightly packed together.  It was hard for me to even know what I had.  Things would be so crammed and sometimes things would fall off of the hanger never to be worn again. 

Walk-In Master Closet Before (my side)

Walk-in Master Closet Before (back)


Walk-In Master Closet Before (organized hubands' side)
 As you can see, my husbands' side of the closet is not that bad.  He wears a suit everyday to work so his wardrobe is simply made up of suits, ties, and dress shirts.  All of his hanging clothes fit BUT he has been storing all of his dress socks in a plastic tub under the bed.  I have no clue how he was picking his socks out like that in the mornings in the dark!  Anyways...the consultant from Closet Tamers came out and had a look at the closet.  She asked me some basic questions about what needed to be in the closet, etc.  She measured all of Phil suits and then measured his shoes.  She told me that the closet system would be custom built to fit all of our clothes!  I told her that I wanted some shelf space, a space to fit my longer dresses, 2 drawers (one for each of us), and places for our shoes.

Two days after our initial design consult the designer emailed me the price quote and CAD drawings of the proposed closet!  Phil and I took the drawing and measured it out in the closet to make sure that it was going to add more hanging space etc.  We went back and forth about it but finally decided that it was worth the money to have a more organized system.

I know that we could have saved some money by doing all of this ourselves.I had been looking into all kinds of DIY closet solutions since we had moved into the house.  My biggest fear about going that route was that it would not be able to take the weight and fall off of the wall in the middle of the night.  That exact thing did happen to me before at our Bloomington apartment.  Twice in fact.  The entire closet collapsed in the middle of the night.  It sounded like a gunshot and Sanibel (our dog) jumped up onto the bed in fear and started to have a seizure.  I was pregnant at the time and Phil was living in South Bend for his internship for the summer.  Needless to say I am scarred for LIFE!
Closet Tamers CAD Drawing of Our New Proposed Closet


We decided to go ahead with the plan.  Closet Tamers priced quoted us everything including the installation.  We decided to do all of the closet demo ourselves to save a little extra money.
I moved all of the hanging clothes to the bathtub and emptied the closet.  I took down all of the shelves myself and pulled everything off of the wall.  Then I patched all of the holes and sanded the walls down.  Then we repainted the entire closet so that it was fresh looking.  Closets can get really beat up!


Closet Demo
Luke and Daddy Painting the Closet
Saving Some Money By Painting Ourselves

Two weeks later they came and installed the new system!  Yippee!
New Closet (husbands side)
New Closet!  (My side)
And here is the new closet with all of our stuff moved back in!  I went through every single piece of clothing and only put back in the things that I knew fit and that we would wear.  Everything else is getting donated!  I LOVE it!
Love it!

Love it!

Love it!

Our new closet uses the vertical space SOOOO much better!  I knew that my husband would end up loving it and HE DOES.  He is naturally much more organized than I am and I wanted to do this for him!  He deserves it and we both actually LIKE putting our clothes away now.  We can walk in and out of it so much easier and actually SEE our clothes.  It even smells like a new house in the closet with all of the new paint and new construction.  I am totally sold on professional closet systems now!  In the future I foresee myself having custom closets installed in any future houses!


Friday, March 16, 2012

Organized Pantry: Before and After

Pretty much every area of our house has been affected by the addition of a new baby 3 months ago.  But our snack situation has gotten OUT OF CONTROL!!!  My husband has gratefully taken on most of the grocery shopping which has been a huge help to me and a huge help to our budget.  I make him a list and he sticks to it!  Amazingly, we have been staying within and below our food budget for the first time in maybe forever!  So that's been all good BUT he has a tendency to pick up a few extra additions in the cereal/chips/cracker department and they have accumulated on top of the fridge.  I can't blame him totally for this but the biggest problem is that the kids can SEE exactly what they want up there and beg all day for snacks until I cave.  

This is especially the case with the giant family sized container of Nesquik (big yellow container) that I use to make chocolate milk.   Micah (still not really talking) spends most of his free time pantomiming a chocolate milk scenario.  Poor guy.  As you can see there is also a giant family sized bag of chips, Sams Club box of Cheerios and 20 pounds of flour.  I figured it was time to spare him!  So I cleared it out...

                                                          Before                                                                                                                           
After

I am happy to have found new home for everything (out of sight) except the knife block which, of course, has to be on top of the refrigerator because otherwise Micah finds a way to pull out the butcher knife and whip up a fruit salad while I am changing a diaper.  (He is 2!)
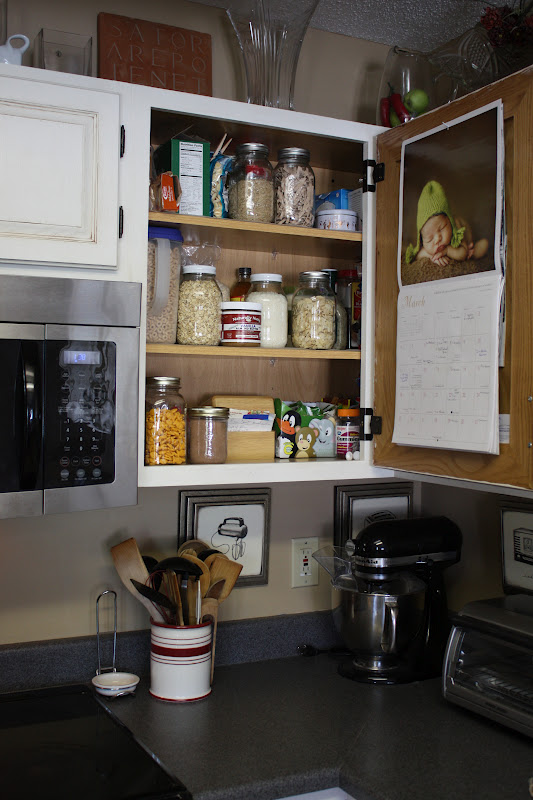
I have a tiny kitchen and no pantry so I use one cabinet for dry goods and the spill over goes in the hall closet.  I didn't think that this cabinet was that bad (just disorganized) but I did manage to throw away some expired canned goods.  One can was from 2010 and I remember moving it from B-town and then never used it!  What a waste.  There were a few other random bags of a little of this and a little of that and I pitched those.  Then I poured all of my granola making supplies into canning jars for ease of use.  I love it already!  Also, I poured some of the Cheerios from that giant box into a plastic pitcher and now it fits in that cabinet as well.  So I have a whole shelf devoted to cereal, oatmeal, and granola!  I also put Goldfish crackers from the big box into a Mason jar and did the same with the Nesquik.  Now all of the snacky snacks can be behind a closed door and concealed in inconspicuous containers.
 
                                    Before                                       After
And now for my most embarrassing trouble spot...dun dun dun...the hall closet.  It is STILL kind of bad but I managed to clear off an entire shelf to make room for the chips, crackers, bag of flour etc. from on top of the fridge.  I dream of some day having a luxurious large kitchen pantry where all of my food and small appliances can live together in peace and harmony but until then we must make do and be content with what we have!  At least everything is easily accessible and that is key for a kitchen pantry.  I firmly believe that if you can't find something it won't get used and then 2 years later you throw it away!  While in the meantime you accumulate 5 containers of baking powder.  Ugg.

                                  Before                                                    After

I did find that cutting the tops off of the bulk boxes makes the items inside more accessible!  So I will probably start making this a habit in the future.

 An easy way to simplify life and feel just a bit more free and get ready for spring!

I posted this as an entry into The Simple Mom "Project: Simplify 2012" challenge.   You can enter too, the deadline is tomorrow (Sat) at midnight.

Related Posts Plugin for WordPress, Blogger...