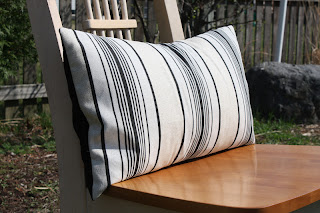
Pick fabrics that make you smile!
Step 2:
This is the trickiest step (at least for me) because it involves math. Measure your pillow that you are covering. It can be a new pillow form or an existing one that your are recovering. Measure from seam to seam and write it down. Okay. Now add 1" to the vertical measurement and 6" to the horizontal measurement for the back. For the front piece add 1" to the vertical and horizontal measurement. So if your pillow is 20" x 20" your back piece will be 21" x 26" and your front piece will be 21" x 21"
Got that?
Step 3:
Cut out your two pieces. You can have both sides out of the same fabric or you can get creative and make them different. There is no right or wrong way to mix fabrics!
Step 4:
Okay. Now take your back piece and lay it in front of you. Fold it in half horizontally and cut it straight down the middle. Now you have two back pieces.
Step 5:
Take one side and fold over the edge 1/4" and iron and then fold it over again and iron. You are making a hemmed edge and pin it with straight pins. Stick your straight pins in horizontally so that they are easy to pull out as you sew. Now repeat this step with the other back piece.
Step 6:
Machine sew a straight line along the edge of your hem. Repeat this step on the other back piece.
Step 7:
Lay out your front piece of fabric face up on the table. Make a mark on your fabric with chalk on the wrong side of your fabric if you have a damask fabric (like me) that is similar on both sides so that you know which side is the back. Now lay the 2 back pieces on top of the front piece with the right side of the fabric facing down. Over lap the back pieces.
Step 8:
Pin around the edge of the pillow and then sew around the entire edge.
Once you have sewn around the entire edge pull out your pins. and snip off your corners.
 |
| Snip off the corners for sharper corners when you turn the pillow right side out. |
Turn your new pillow cover right side out and stuff the pillow form inside the cover. And you are done!
Make another one! Get creative...
Make a statement!
I guarantee your pillow will be one-of-a-kind!
So give your room some fresh new spring panache!
*You can even follow this same process with an iron and no-sew hem tape!
*The secret to success in creating a lovely pillow is using a high quality pillow form. I am totally sold on pillow fills that are made from a mixture of feathers and down. If you have a quality fill then you can get away with a lower quality of fabric. I have found that if you make a pillow out of top of the line fabric it can look scrawny and shapeless if you use a lower quality fill. So if you have to scrimp someplace do it with the fabric and not the fill.
Good luck!


1 comment:
Hey There!
Great tutorial!
Check out my blog: underhisumbrelladesigns.blogspot.com
I do free designs, I'd love to design yours:)
Post a Comment